if you can imagine it, we can create it
joshua franke . 0408 476 733
if you can imagine it, we can create it
joshua franke . 0408 476 733
Hi I’m Joshua Franke and I’ve been building stone houses, stone walls and stone features for over 20 years. Many people take a great interest in Basalt Stone walls, so we thought we’d put together some information to assist those considering taking on a project to DIY a Basalt stone wall themselves.
To start Basalt is a wonderful natural stone to work with, durable with stark natural contrasting beauty. If you are still weighing up the best stone to work with, you might like to read, Top 10 Reasons to Build Basalt Stone Walls
In part 2 of the series we will at the Planning phase for your Basalt Stone Wall.
DIY overview of the steps required to build a Basalt Stone Wall
Addendum: Secrets to Building a Retaining Wall
Tools & Equipment Required
Warning
Walls higher than 3 foot will need a professional’s expertise for overall safety.
Tips
Always avoid the use of small rocks at the wall base. Try using the biggest basalt stones you have as the base and the progressively medium sized and smaller rocks as you work upward. It’s important to build a strong heavy foundation which will make the wall strong and uniquely decorative as your work higher.
Calculate the Ratio of Height to Base Thickness
Conduct a full site survey of the area where you want to build the basalt stone wall and draw out a comprehensive three dimensional plan. This will save untold time to get it right first time, and later as you encounter challenges during the build.
How high do you want the wall to be? When considering the height, consider that for every foot of height, you want roughly the same amount of thickness in the base. If your wall will be over four feet high, try keeping a reasonably consistent thickness of 3-4 foot.
As further considerations, if you want to build a very high 10 foot plus high wall, you will need to increase the thickness at the base to around 6-7 feet, keeping it consistent until you reach about half the height of the wall. Upwards from there start tapering in on the front face of the wall, ending with a width of 2–3 feet at the top. In all cases, the width at the top of your wall should be around this width.
Positioning your wall should take careful consideration and planning. The use of a natural slope or bank may seem an obvious choice, although by selecting a back point of the wall a few feet out may save material. By building a shorter wall you can keep the same slope, or you can make a more gradual slope by pushing the wall even further out. You can add more soil/gravel behind the wall to fill the gap.
Note: For most DIYers, walls three-feet high and below will be manageable. For greater heights, you may want to call in a professional stonemason familiar with managing heavy rock for safety reasons, and to ensure the wall is built correctly. You may also need council approval for walls higher then 3-4 feet, depending on where you live.
Basalt Stone Walls need to slope towards the Back
For wall stability to manage pressure from the backfill, plan to dig out the foundation and lay the stones so that the stones slope towards the back of the wall – around a two-inch drop for every foot of height.
Diagrams – Draw a Three Dimensional Cross-Section of the Wall
Looking at the diagram side-view of your wall, you should see a triangle shape. Plan so that the area of the triangle should be at least the same or larger than behind, from the back of the base up. This will ensure the natural weight of the stones with the inward slope is secure enough to withstand pressure from the backfill.
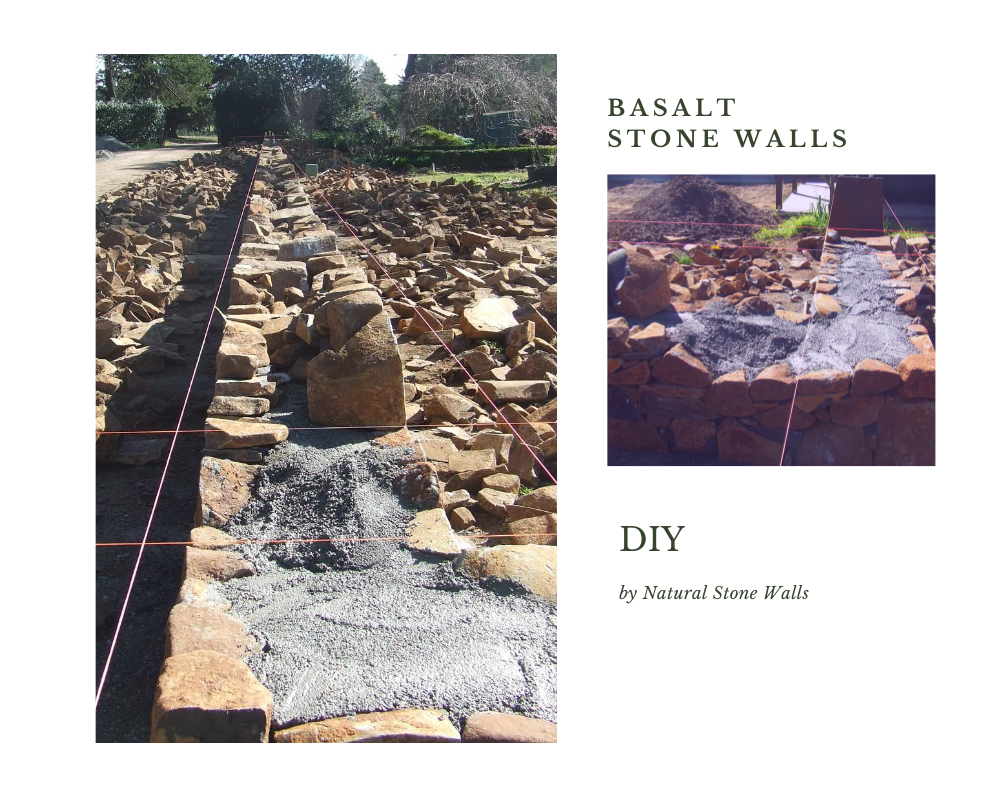
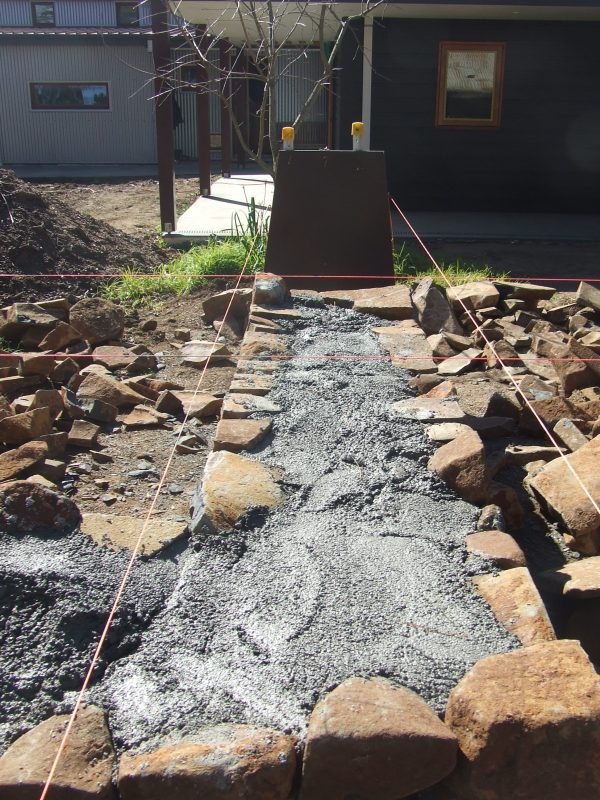
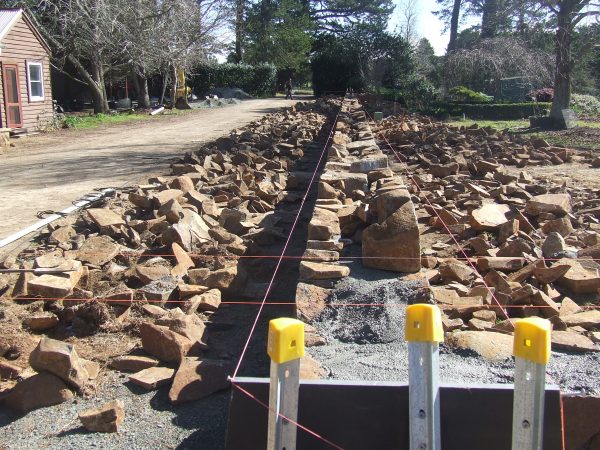
In the photos below of a Basalt Stone Wall in progress, note the inward slope on the formwork.
Secondary Tier Walls
If you want to build and create a second tier, plan where your wall faces and where the back backing will end up, plus the upper wall’s weight distribution onto the area below in the wall.
Example; with a four-foot wall in the front, and a second wall in the back that is only three feet behind the finished face of the front wall, the entire weight of the second wall will push against the centre of the first wall, this will cause the wall to bow outwards and eventually crumble. This is because the upper wall is spreading its weight over the area below at an angle of 45 degrees from its edges.
In summary, if you’re planning a DIY Basalt Stone Wall build remember to plan carefully to save time and avoid mistakes.
You can learn more about basalt by following these links.
Is basalt a good building material? – https://smarter-building-systems.com/smarter-building-basalt-faqs/
What is basalt link – https://en.wikipedia.org/wiki/Basalt
You may also be interested in – Sandstone Log Walls
Natural stone and rock can be used for a variety of flexible ways on your property, including:
Call Josh to discuss your landscaping project and learn more about basalt stone walls walls – 0408 476 766
You may also be interested to learn about the Top 10 Reasons to build Basalt Stone Walls
We service a wide range of areas including Narellan, Leppington, Harrington Park, Oran Park, Gledswood Hills, Smeaton Grange, Mount Annan, Menangle Park, Tahmoor, Bowral, Exeter, Sutton Forrest, Bundanoon, Robertson, Marulan, Renwick, Braemar, Liverpool Area, Camden, Campbelltown, Wollondilly, Wingercaribee
Website designed & built by HighlandCreative.com.au